Never heard of vehicle wrapping? It’s a process of covering a car with a vinyl, more often for advertising than for personal use. This type of advertising is especially popular among small businesses: a cost of ad comes down to .Vehicle wrapping makes it easy to change the appearance of a car as often as one would like and comes much cheaper than respraying. In addition, vinyl also protects the original paint.
Before diving into designing, check out the requirements of chosen printing company you’ll be working with: what kind of files they accept, what type of colors your artwork should have etc.
When you have decided on these, begin with:
1. Template
Perhaps this is the most important step for a successful car wrap design. Make sure to begin with an accurate template. You can get it from a manufacturer, download online, or buy a set of outlines available on the net. Correct template is vital if you want to deliver a desired result.
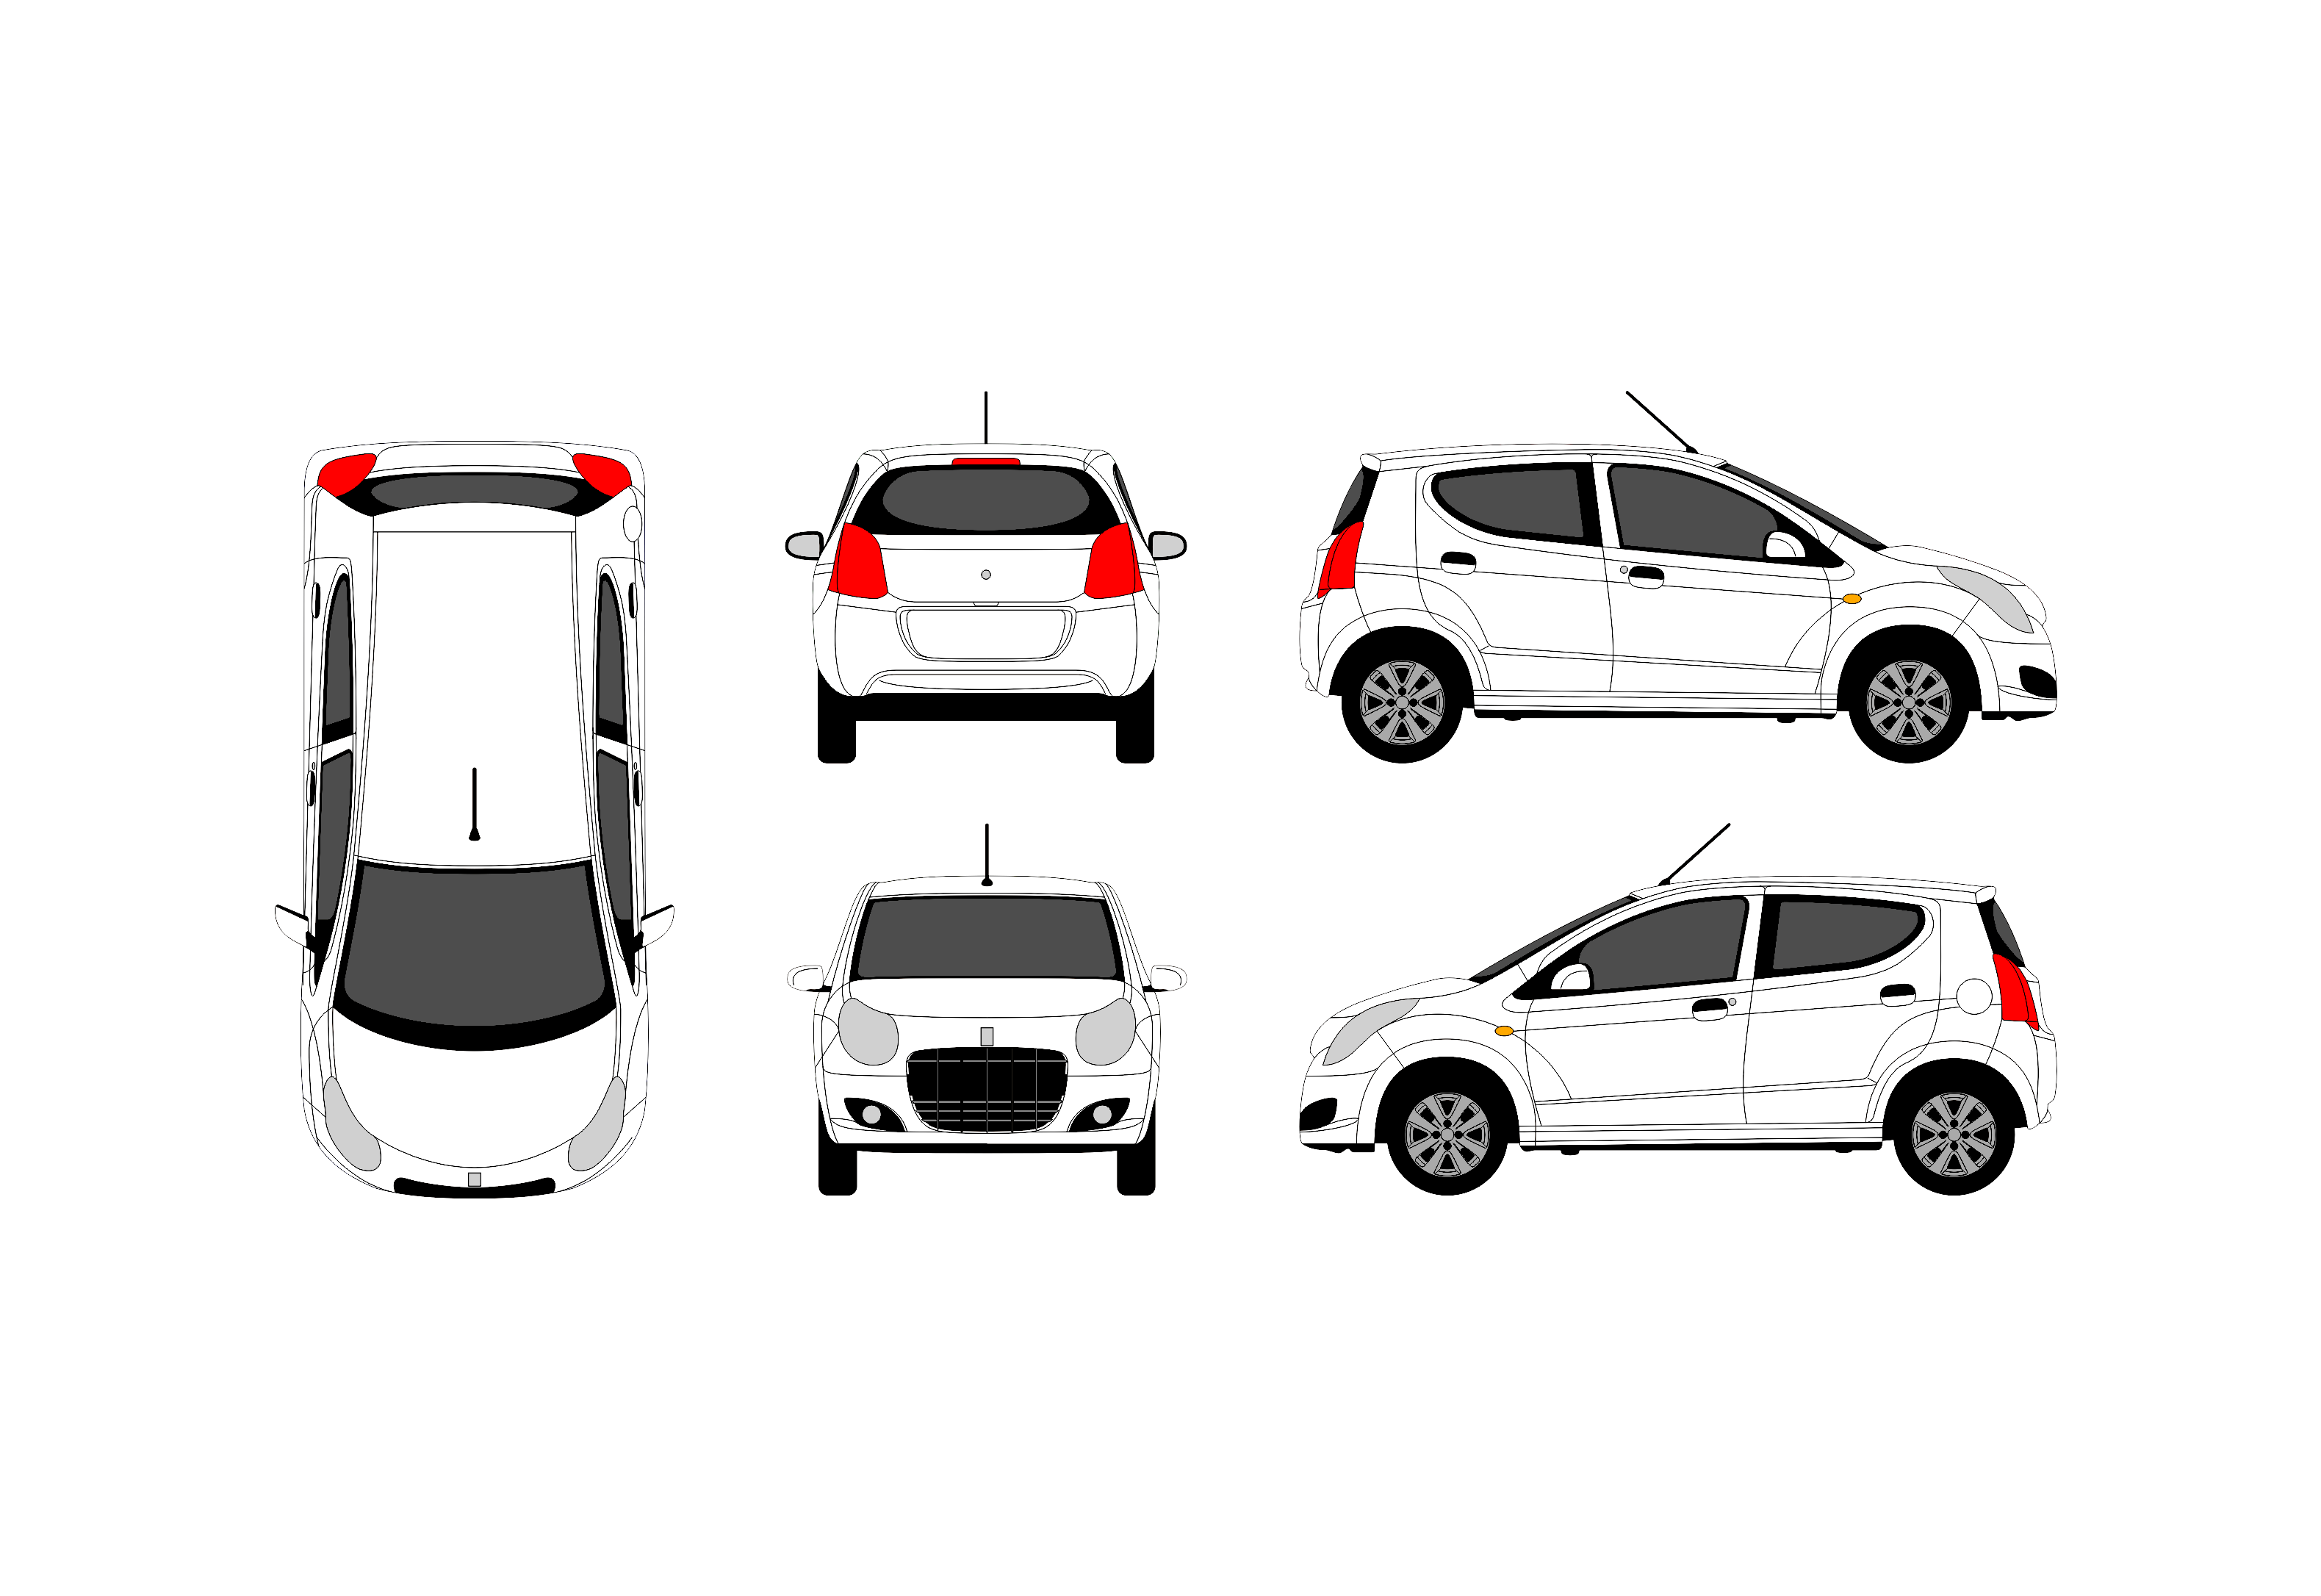
2. Scale
Apart from template, you also have to worry about the initial size of your design. As most templates come drawn at a scale of 1:20, you’ll have to change it and set a 1:10 scale instead. With such scale size 1 inch on your screen is equal to 10 inches in real life.
3. Layers
When you have received a correct template and set a scale accordingly, proceed with setting up layers. You will surely end up with tons and tons of them, so it’s better to prepare in advance.
One layer will have to include all details (bumpers, windows, other plastic elms etc.) so you’ll be able to see your design in realistic way. However, they are not needed for printing, so by separating this layer and moving it to the top of you make your job easier. (haha, hope you didn’t actually believe me here?) P.S. Better keep it locked while you work on other stuff.
Then create separate layers for each view that will be printed out: front, back, top, passengers’ and driver’s sides etc. You’ll have to put a copy of car’s outline on each layer to clip the image placed there. Create a Clipping layer, instead of a clipping path, so images would get clipped no matter where they are placed.
It would also be a plus if you put a name for each layer, as keeping it organized from the start is a total plus for giving printed a usable source to work with.
4. Finished looks
Keep orienting on how the finished product is supposed to look. How the wrap will look from different angles – when in movement, waiting in traffic or simply parked at the corner. Lots of text may not be the finest decision, while bright colors will attract the desired attention. Beware any “unexpected†surprise due to opening a door or a window and missing a text part.


5. Corners
Your design will be tiled into panels (approx. 52 inches). Meaning a design of side view will have to connect well with front and back view. They should either match together, or be completely separate.
P.S. If a vehicle will have a slidedoor, try to prevent any awkward crossovers.
6. Resolution
Be sure you are using high resolution image, as the preferred resolution for an image placed is 720dpi – much higher than what is preferred for standard offset printing. The reason is that these files will be output at 1000%. File sizes will be large.
7. Consult
Some parts of a car are not allowed to be covered. State laws regulate what windows can and cannot be partially covered, and some plastic materials just simply non-coverable. Consult the installer to know your limits and to understand what parts of design will be cut.
8. Bleed area
Leave at least 3 inches of bleed area outside the car outline. If you’re not sure that the size is right, leave even more. Better be safe than sorry.
9. Colors
It’s better to stay away from spot colors, go ahead and convert them to CMYK or RGB. Spot colors may cause additional trouble during printing process.
10. Save
Save you finished project and give it to a printer. Check whether you have included all linked files.Printer will surely want to amend something, so be ready. Listen carefully to their suggestions to deliver an even better result. It’s also good to double check everything to avoid any mistakes that will cost you a dime.
See how to design a car wrap in Photoshop and Illustrator: